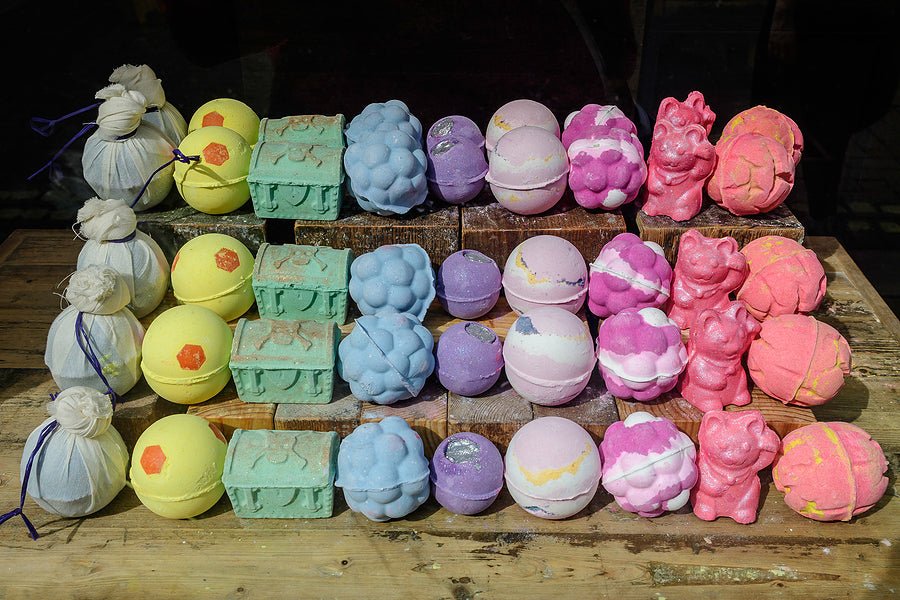
As bath bomb makers, you understand the importance of creating a truly captivating bathing experience. While the process of crafting the perfect bath bomb is essential, the art of decorating the finished product adds that extra touch of magic. In this blog post, we will explore seven detailed techniques that will take your bath bombs from delightful to dazzling. Whether it's coloring, glitters, dried flowers, icing, and more, get ready to unlock a world of creative possibilities.
-
Vibrant Coloring: Coloring is perhaps the most fundamental and effective technique for enhancing the visual appeal of your bath bombs. Use high-quality colorants or bath bomb dyes to achieve vibrant hues that transform your bathwater into a kaleidoscope of colors. Remember to experiment with color combinations to create eye-catching designs and gradients.
-
Glittering Brilliance: For those who love a touch of sparkle, adding glitters to your bath bombs is a surefire way to captivate your customers. Whether you opt for fine or chunky glitters, choose shades that complement the color scheme of your bath bombs. A sprinkle of shimmering magic will create an enchanting bathing experience that leaves your customers in awe.
-
Dried Flowers and Botanicals: Nature's beauty can be preserved and showcased in your bath bombs by incorporating dried flowers, petals, or botanicals. This technique not only adds an exquisite touch but also introduces delicate fragrances that enhance relaxation. Choose flowers and herbs that are safe for the skin and select colors that harmonize with your bath bomb's aesthetic.
-
Icing and Drizzles: Emulate the artistry of cake decorating by using icing or drizzles to adorn your bath bombs. This technique allows you to create intricate patterns, lines, and even personalized messages. Use a piping bag or small squeeze bottle to apply icing made from ingredients such as melted cocoa butter or shea butter for an elegant finishing touch.
-
Mica Powders and Paints: Mica powders and paints offer a wide range of possibilities for adding shimmer, depth, and even artistic designs to your bath bombs. Apply them using a brush or spray to create stunning gradients, unique patterns, or delicate accents. Experiment with different application techniques to achieve the desired effect.
-
Embedding Surprise Elements: Inject an element of surprise and delight into your bath bombs by embedding small toys, charms, or decorative elements. As the bath bomb dissolves, these hidden treasures will be revealed, creating a memorable and interactive experience for your customers. Ensure that the embedded items are safe for use in the bath.
-
Customized Stamps and Imprints: Make your bath bombs truly one-of-a-kind by incorporating customized stamps or imprints. Create your own designs or use pre-made stamps to leave unique impressions on the surface of your bath bombs. This technique adds a personal touch and sets your creations apart from the rest.
With these seven detailed techniques for decorating finished bath bombs, you now have the tools to transform your creations into awe-inspiring works of art. Remember to experiment, unleash your creativity, and pay attention to every intricate detail. By elevating the visual appeal of your bath bombs, you will provide your customers with an extraordinary bathing experience that they will cherish.
We would love to hear about your favorite decorating techniques for bath bombs! Which techniques have you tried or are you eager to experiment with? Share your thoughts and ideas in the comments section below and join our community of bath bomb artisans.
At The Bath Time, we are dedicated to providing you with expert guidance and inspiration to help you create bath bombs that delight and enchant. Stay tuned for more in-depth tutorials and tips from our team of professionals!
Leave a comment